Deploying a Full-Stack MERN Application with Docker
A Step-by-Step Guide
Developing a modern web application often requires a robust setup to manage the backend, frontend, and dependencies efficiently. The MERN stack (MongoDB, Express, React, Node.js) is a popular choice for building full-stack applications. When combined with Docker, it simplifies development, testing, and deployment. This article will guide you through setting up a MERN application and containerizing it with Docker, ensuring a seamless workflow.
What is Docker?
Docker is a platform that allows you to package applications and their dependencies into containers. Containers are lightweight and portable, and ensure that your application runs consistently in any environment, from local development to production.
Prerequisites
Before we start, ensure you have the following installed:
• Node.js and npm: For managing the backend and frontend dependencies.
• Docker: To containerize and manage your application.
Step 1: Setting Up the Project Directory
Start by creating a project directory for your MERN app. Here’s the folder structure we aim to achieve:
mern-docker-app/
├── backend/
│   ├── package.json
│   ├── server.js
│   ├── Dockerfile
│   ├── routes/
│       └── api.js
├── frontend/
│   ├── package.json
│   ├── public/
│   ├── Dockerfile
│   └── src/
│       └── App.js
├── docker-compose.yml
├── .env
└── README.md
Step 2: Backend Setup
Navigate to the backend directory and initialize a Node.js project:
mkdir backend
cd backend
npm init -y
Install the required dependencies:
npm install express mongooseCreate a server.js file in the backend directory and add the following code:
const express = require('express');
const mongoose = require('mongoose');
const cors = require('cors');
require('dotenv').config();

const app = express();
app.use(cors());
app.use(express.json());

const PORT = process.env.PORT || 5000;

// MongoDB connection
mongoose
  .connect(process.env.MONGO_URI, { useNewUrlParser: true, useUnifiedTopology: true })
  .then(() => console.log('MongoDB connected'))
  .catch((err) => console.error(err));

// Sample API route
app.get('/api', (req, res) => {
  res.send('API is running...');
});

app.listen(PORT, () => console.log(`Server running on port ${PORT}`));
Create a Dockerfile in the backend directory and add the following code:
# Use Node.js official image
FROM node:18

# Set the working directory
WORKDIR /app

# Copy package.json and install dependencies
COPY package*.json ./
RUN npm install

# Copy the application code
COPY . .

# Expose the backend port
EXPOSE 5000

# Start the server
CMD ["node", "server.js"]
Step 3: Frontend Setup
Navigate back to the root directory and create the frontend directory. Initialize a React app:
npx create-react-app frontendUpdate the frontend/src/App.js file with the following code to fetch data from the backend:
import React, { useState, useEffect } from 'react';

function App() {
  const [message, setMessage] = useState('');
  const [error, setError] = useState('');

  useEffect(() => {
    fetch('/api')
      .then((res) => {
        if (!res.ok) {
          throw new Error(`HTTP error! Status: ${res.status}`);
        }
        return res.text();
      })
      .then((data) => setMessage(data))
      .catch((err) => setError(err.message));
  }, []);

  return (
    <div>
      {error ? <div>Error: {error}</div> : <div>{message}</div>}
    </div>
  );
}

export default App;
Next, add the following to the frontend/package.json file to configure the proxy for development:
"proxy": "http://host.docker.internal:5000"Create a Dockerfile in the frontend directory and add the following code:
# Use Node.js image to build the frontend
FROM node:18

# Set the working directory
WORKDIR /app

# Copy package.json and install dependencies
COPY package*.json ./
RUN npm install

# Copy the application code
COPY . .

# Expose the frontend port
EXPOSE 3000

# Start the frontend
CMD ["npm", "start"]
Step 4: Orchestrating with Docker Compose
To connect the backend and frontend, we’ll use Docker Compose to define and manage multi-container applications.
Create a docker-compose.yml file in the root directory to manage the services:
version: "3.8"
services:
  mongodb:
    image: mongo:latest
    container_name: mongodb
    ports:
      - "27017:27017"
    volumes:
      - mongodb_data:/data/db
    environment:
      MONGO_INITDB_ROOT_USERNAME: admin
      MONGO_INITDB_ROOT_PASSWORD: password

  backend:
    build: ./backend
    container_name: backend
    ports:
      - "5000:5000"
    environment:
      - MONGO_URI=mongodb://admin:password@mongodb:27017/
    depends_on:
      - mongodb

  frontend:
    build: ./frontend
    container_name: frontend
    ports:
      - "3000:3000"
    depends_on:
      - backend

volumes:
  mongodb_data:
Save this file at the root of your project. It defines three services:
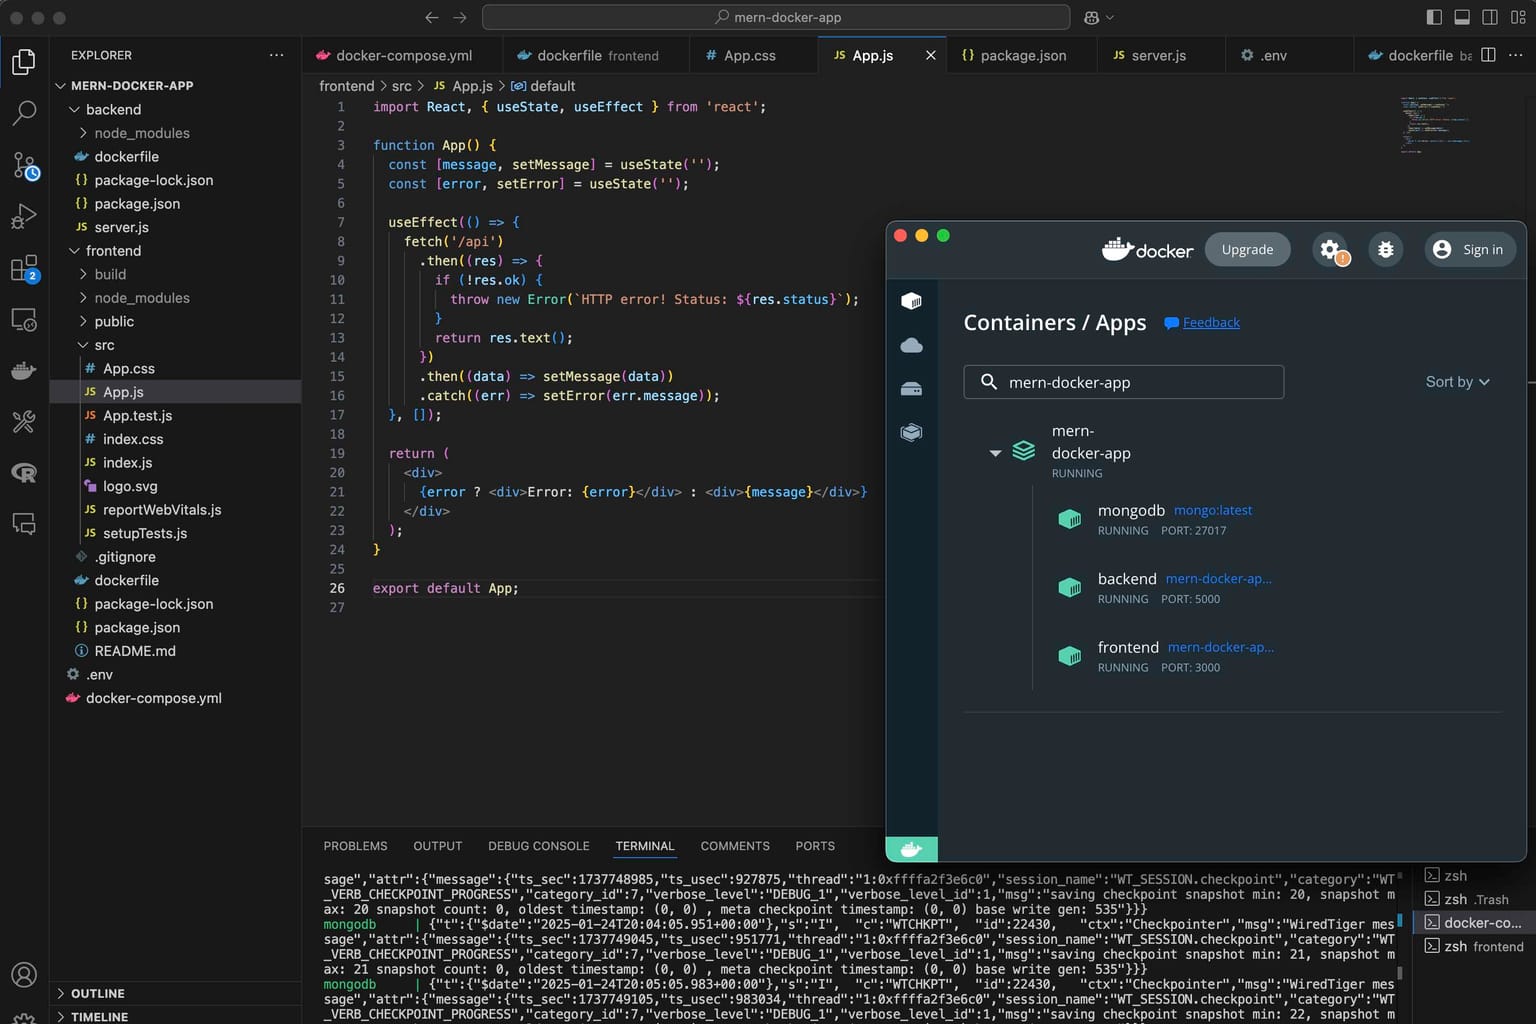
• backend: Builds the backend container and exposes it on port 5000.
• frontend: Builds the frontend container and serves it via NGINX on port 3000.
• mongo: Runs the MongoDB container for data storage.
Step 5: Building and Running Containers
To build and run your application, follow these steps:
1. Open a terminal in your project root directory.
2. Run the following command to build and start all services:
docker-compose up --buildThis will build the Docker images and start the containers for MongoDB, the backend, and the frontend. You can access the application:
• Frontend: http://localhost:3000
• Backend: http://localhost:5000/api
• MongoDB: mongodb://mongo:27017
Step 6: Testing the Application
Visit the frontend at http://localhost:3000 to see the React app fetching data from the API. You can also use tools like Postman or curl to test the backend.
Conclusion
Docker simplifies the deployment process by encapsulating everything your application needs into containers. By containerizing your MERN stack application, you can easily manage dependencies, ensure consistency across environments, and simplify the deployment process. Docker Compose allows you to orchestrate multiple services seamlessly, making it an essential tool for modern development.
If you’re ready to take your deployment strategy to the next level or need help Dockerizing your applications, reach out to Rexroth Development today!